
WebSockets
WebSocket procedures enable real-time bidirectional communication between the client and server without the need to manage any kind of infrastructure 🥳.
Important: JSandy's WebSocket implementation is designed specifically for Cloudflare Workers. This is because Cloudflare Workers allow long-lived real-time connections while Vercel and other Node.js runtime providers do not.
A WebSocket handler receives the following objects:
c: Hono context, e.g. headers, request info, env variablesctx: Your context, e.g. database instance, authenticated userio: Connection manager for sending messages to clients
import { j } from "../jsandy"

export const postRouter = j.router({
  chat: j.procedure.ws(({ c, io, ctx }) => ({
    async onConnect({ socket }) {
      // ...
    },
  })),
})
WebSockets Example
WebSockets are incredible for real-time features:
- Collaborative editing
- Real-time chat
- Live dashboard updates
Example: In the WebSocket router below, we implement a basic chat:
- Validate
incoming/outgoingmessages using thechatValidator - Manage WebSocket connections and room-based message broadcasting
import { z } from "zod"
import { j } from "@jsandy/rpc"

const chatValidator = z.object({
  message: z.object({
    roomId: z.string(),
    message: z.string(),
    author: z.string(),
  }),
})

export const chatRouter = j.router({
  chat: j.procedure
    .incoming(chatValidator)
    .outgoing(chatValidator)
    .ws(({ c, io, ctx }) => ({
      async onConnect({ socket }) {
        socket.on("message", async (message) => {
          // Optional: Implement message persistence
          // Example: await db.messages.create({ data: message })

          // Broadcast the message to all clients in the room
          await io.to(message.roomId).emit("message", message)
        })
      },
    })),
})
You can now listen to (and emit) real-time events on the client:
"use client"

import { client } from "@/lib/client"
import { useWebSocket } from "jsandy/client"

/**
 * Connect socket above component to avoid mixing
 * component & connection lifecycle
 */
const socket = client.post.chat.$ws()

export default function Page() {
  // 👇 Listening for incoming real-time events
  useWebSocket(socket, {
    message: ({ roomId, author, message }) => {
      console.log({ roomId, author, message })
    },
  })

  return (
    <button
      onClick={() => {
        // 👇 Send an event to the server
        socket.emit("message", {
          author: "John Doe",
          message: "Hello world",
          roomId: "general",
        })
      }}
    >
      Emit Chat Message
    </button>
  )
}
WebSockets Setup
Development
JSandy uses a pluggable Pub/Sub adapter for real-time messaging. You can choose any provider (e.g., Upstash Redis, native Redis, Kafka, NATS, or Cloudflare Pub/Sub). Upstash remains a great option, but it's no longer required.
-
Provide a Pub/Sub adapter via router config
import { jsandy, UpstashRestPubSub, type PubSubAdapter } from "@jsandy/rpc" import { env } from "hono/adapter" export const j = jsandy.init() // Example: Upstash adapter (optional, replace with your own implementation) const getPubSubAdapter = (c: any): PubSubAdapter => { const { UPSTASH_REDIS_REST_URL, UPSTASH_REDIS_REST_TOKEN } = env(c) return new UpstashRestPubSub(UPSTASH_REDIS_REST_URL, UPSTASH_REDIS_REST_TOKEN) } export const api = j.router().config({ getPubSubAdapter }) -
Alternatively for local development, you can use an in-memory adapter
import type { PubSubAdapter } from "@jsandy/rpc" class InMemoryPubSub implements PubSubAdapter { subs = new Map<string, Set<(p: unknown) => void>>() async publish(topic: string, payload: unknown) { const set = this.subs.get(topic); if (!set) return for (const cb of set) cb(payload) } async subscribe(topic: string, onMessage: (payload: unknown) => void, opts?: { signal?: AbortSignal; onOpen?: () => void }) { let set = this.subs.get(topic); if (!set) { set = new Set(); this.subs.set(topic, set) } set.add(onMessage); opts?.onOpen?.() opts?.signal?.addEventListener("abort", () => set!.delete(onMessage), { once: true }) } } -
Start your Cloudflare backend using
wrangler dev -
Point the client
baseUrlto the Cloudflare backend on port8080:import type { AppRouter } from "@/server" import { createClient } from "@jsandy/rpc" export const client = createClient<AppRouter>({ // 👇 Point to Cloudflare Worker API baseUrl: "http://localhost:8080/api", })That's it! 🎉 You can now use WebSockets for your local development. See below for an example usage.
Deployment
-
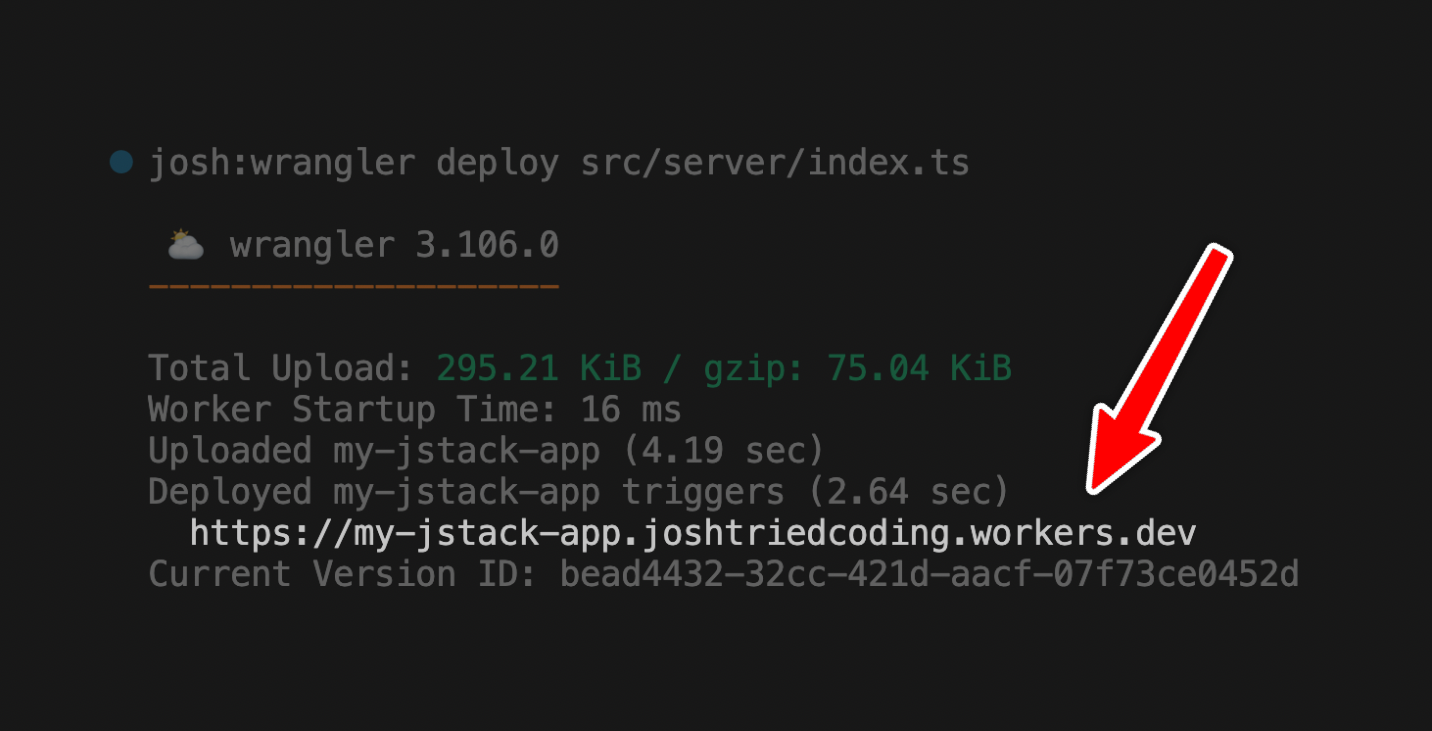
Deploy your backend to Cloudflare Workers using wrangler:
wrangler deploy src/server/index.tsReason: Serverless functions, such as those provided by Vercel, Netlify, or other serverless platforms, have a maximum execution limit and do not support long-lived connections. Cloudflare workers do.
The console output looks like this:
-
Add the deployment URL to the client:
import type { AppRouter } from "@/server" import { createClient } from "@jsandy/rpc" export const client = createClient<AppRouter>({ baseUrl: `${getBaseUrl()}/api`, }) function getBaseUrl() { // 👇 In production, use the production worker if (process.env.NODE_ENV === "production") { return "https://<YOUR_DEPLOYMENT>.workers.dev/api" } // 👇 Locally, use wrangler backend return `http://localhost:8080` }- If you use Upstash, set the
UPSTASH_REDIS_REST_URLandUPSTASH_REDIS_REST_TOKENenv variables in your Worker:
 # Create UPSTASH_REDIS_REST_URL environment variable
 wrangler secret put UPSTASH_REDIS_REST_URL

 # Create UPSTASH_REDIS_REST_TOKEN environment variable
 wrangler secret put UPSTASH_REDIS_REST_TOKEN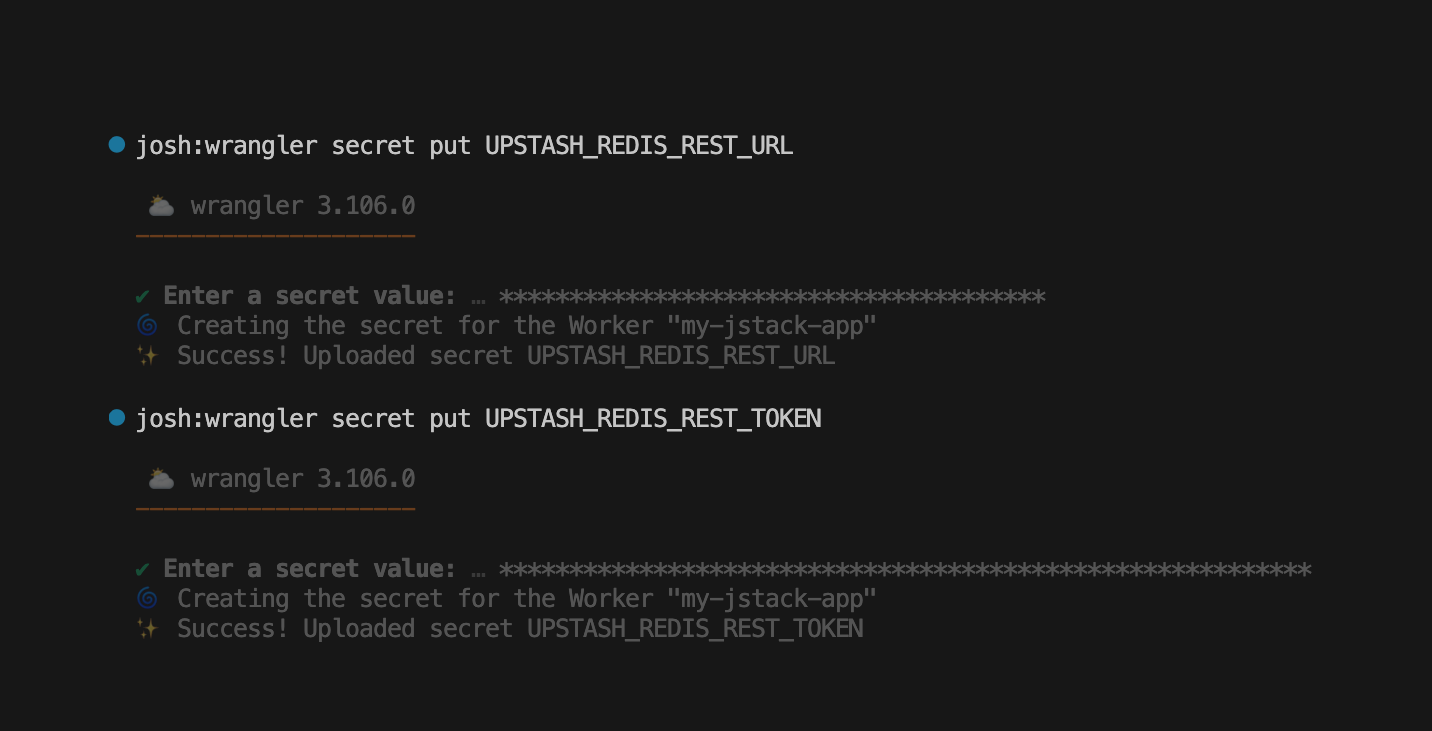
That's it! 🎉 If you now deploy your app to Vercel, Netlify, etc., the client will automatically connect to your production Cloudflare Worker.
You can verify the connection by sending a request to:
wss://<YOUR_DEPLOYMENT>.workers.dev/api/<ROUTER>/<PROCEDURE>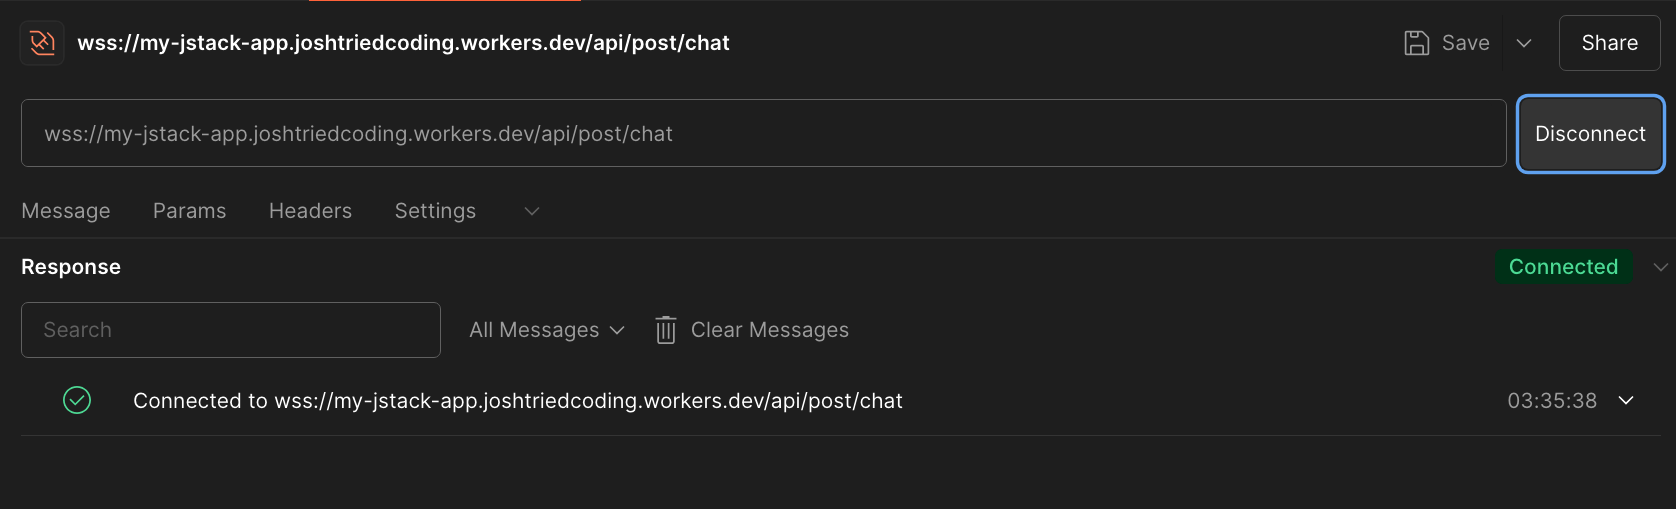
- If you use Upstash, set the